


Some Creative Gratitude
Some Creative Gratitude


As I was working on the journal page I shared yesterday, I ran across my stitching guides - a set of plastic templates I picked up a long time ago (photos below). I don't think I have actually ever used them though. I have that problem with some supplies - I think it will take a long time to use them so I shy away from them. This was really very quick though - entire element probably took about ten minutes to make - and that included the drying time for my water colors. I have been using this art journaling practice as a time to try things, fail at things, and just generally develop a more creative and experimental spirit.
I'm glad I did because it made me run across this needle. Why, you ask, is a needle important? Well, the actual needle isn't all that important at all - but the card that it was tucked into in my box of supplies - well that's got my Grandma Monroe's handwriting on it. You see, it was her needle, and, like many of her crafting tools, I've kept them for all of these years. They are tucked into index cards, Tic Tac containers (she loved these for storing needles), and even a few original packages with her note of how much she paid for it written on it - usually when she got a really good deal!
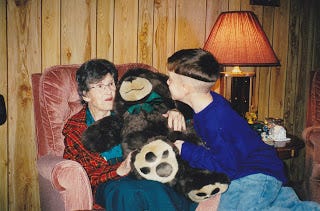
Grandma Monroe and I had a somewhat strained relationship when I was a little girl. We didn't show how we loved one another in the same ways. As an adult though, I spent the last year and a half of her life living in her home - sometimes wondering who was taking care of who - and enjoying her stories and her love of crafting. Where the love of all things crafty grew from in me is no secret - it was very clearly my Grandma Monroe. I think of her often when I sit in my studio - my favorite picture of her is on my inspiration board that sits at the back of my desk - she and my nephew Andrew on her last Christmas with us. I don't know if you can tell from the can - but the looks on both of their faces are absolutely beautiful. She would be SO INCREDIBLY PROUD of that young man if she were still with us. She would have celebrated her 105th birthday last week! I am so thankful for her legacy in my life.
Now, as promised, a tutorial on how I did the stitched piece - and if you don't have stitching guides like the ones I have - don't worry - I've got a substitution idea for that - as well as just about everything else I used. To create this, I used:
watercolor paper (you could use regular paper, cardstock, and I'd love to try this on actual cross-stitch or other fabric and paint it - will have to give that a go sometime)
watercolor paints (a non-waterproof marker/pen and water on a q-tip works well too, also regular markers or any other kind of paint or color)
stitching guides (or print the words in a favorite font in Microsoft Word and poke holes through that at appropriate stitching points)
a punching tool (a really thick needle like my grandma's rug needle or an awl)
stitching needle and embroidery floss or thread (I used two strands of embroidery floss that I doubled over - so it's four strands in total)
any embellishments you want to add
Stitching on paper isn't new - and probably isn't even that cool anymore - but I liked the technique - so here is the step by step:
1. Mark the position of where your holes will go that you will sew through. Punch through the paper at those spots. (BTW - my stitching template is from Bazzill Basics if you can't see that in the photo below - they appear to still make such things - you can see a selection here)

Penciled in stitching holes

Poke through the holes - poke from the front of the piece to the back.
2. Apply your watercolor or other color and then let dry (you can speed things along with a heat gun or blow dryer - but make sure to test that out on a test swatch first so you don't get bubbling or something else you don't like when the heat hits the paint)

You can see I was using a piece of paper that I have done other stuff on - I keep test pages like this at my side and often end up incorporating those little "what if I try this" swatches into journals or other art work.3. Start your needle and floss through the first hole, stopping with about a 1/2" of floss left on the back side. Add some tape to secure the floss to the back side - being careful to NOT tape over any holes (you can pierce through the tape with the needle - but it makes the floss sticky and more likely to knot up). I added a close up of the first image (sorry it's fuzzy) to help you see a little better)

Start from the back of the page and pull the floss through to the front for that first stitch...I didn't take a photo of the back, but when it's all done - the back won't look like anything :-)

4. Stitch the image. I decided to go with a running stitch - if you don't sew that often (or just want to see a really pretty art journal page) - take a look at this gorgeous art journal page from Jane LaFazio when she was doing a guest post on Alisa Burke's blog. I think seeing that page is what inspired me to find my stitch templates.


A couple of tips:
The floss seems to get more kinked than it does when it's going through fabric so you may need to stop every so often, hold the page with the needle just dangling off of it and let the floss spin a bit to get those twists out.
Cut the floss and move t the next word rather than going a really long distance on the back. If you do go a long distance on the back, use some tape to strengthen the page along that distance. It's better to move the floss to a new starting point - otherwise your page might buckle.
5. Add embellishment if desired. I have NEVER been able to make a french knot on fabric - the only thing I was doing on paper was making a bigger hole - so I gave up and used some sticky jewels instead. (Added bonus: No frustration AND pretty sparkles all at once :-)

Because the piece has stitches on the back you'll most likely need glue dots or some other sort of thicker adhesive to put it on the page and it won't lay perfectly flat. If you are inspired by the idea, I'd love to see your work - drop a note in the comments!